Ok guys, this has been discussed a couple times before, but now i'm finally going to make an actual in depth tutorial on the subject! This is a special technique that as far as i know, is a completely new way to texture tracks and could revolutionize this game.
To begin, you'll need some programs to get started.
1 - Photoshop 2.0 or higher. I can't tell you how to get it, but i'm sure you'll find a way

Paint job pro might also work, but i'm not familiar with the program so i can't guarantee it.
2 - Traxx and all essential programs for track editing.
Simple enough right?
Ok, i'll do this tutorial in an easy to follow step by step picture heavy manner.
Step one,
By now you should have the entire track laid out and ready to texture. I suggest texturing last so you can line everything up as perfectly as possible.
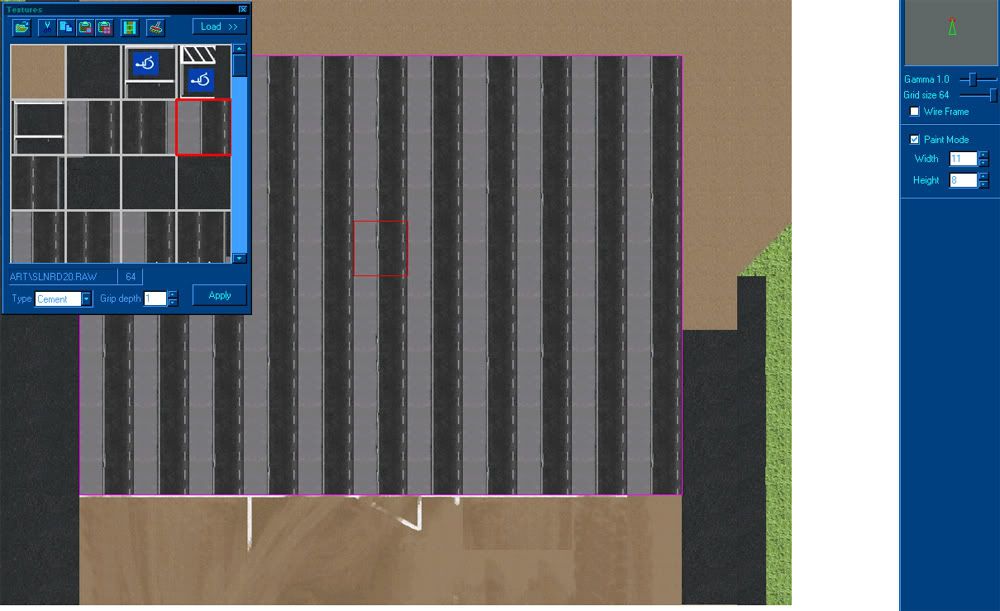
The first thing we'll do is, in traxx, set the "wire frame" option in the right of the screen to all black and green lines by clicking the check mark. Just click it twice and you can keep clicking it to cycle through the different grid styles.
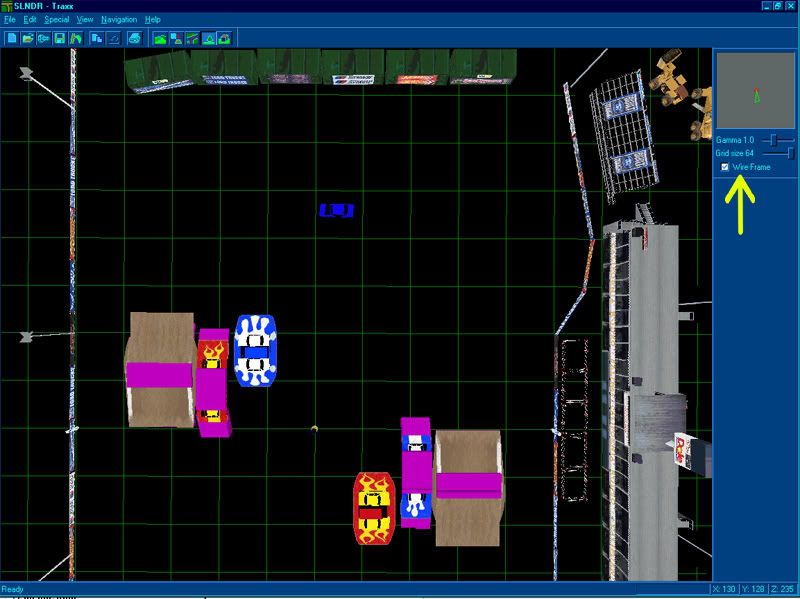
Now press the Printscreen button to take a picture of the track from overhead like seen above(we may need to retake the picture later on so don't close anything). Now you need to open Photoshop(or which ever program you use) and make a new image. The size depends on how many grid spaces your track floor is. Since salinas is 11x8(half of the track) we'll make the picture 704x512. Figuring out the size is as simple as taking the number of grids(11 for example) and multiplying it by 64(704 pixels wide).
*IMPORTANT NOTE - i forgot to mention above, but you need a surrounding border around the picture of dirt textures. So add 2 pixels to the bottom and top of the image(instead of 11x8 it will now be 13x10).
Since we don't want a ridiculous amount of textures(lag) we'll texture half of the track and simply reverse the texture later on in the tutorial.
Now that the blank image is up, you need to find a good dirt texture to use. Make sure it's a nice seamless(everything looks the same) texture so you have no repetitive looking problems like a big rock in the middle of the dirt for example. Past the dirt texture as many times as necessary to fill the entire 704x512 blank canvas.
When you're done, you should have something like this,
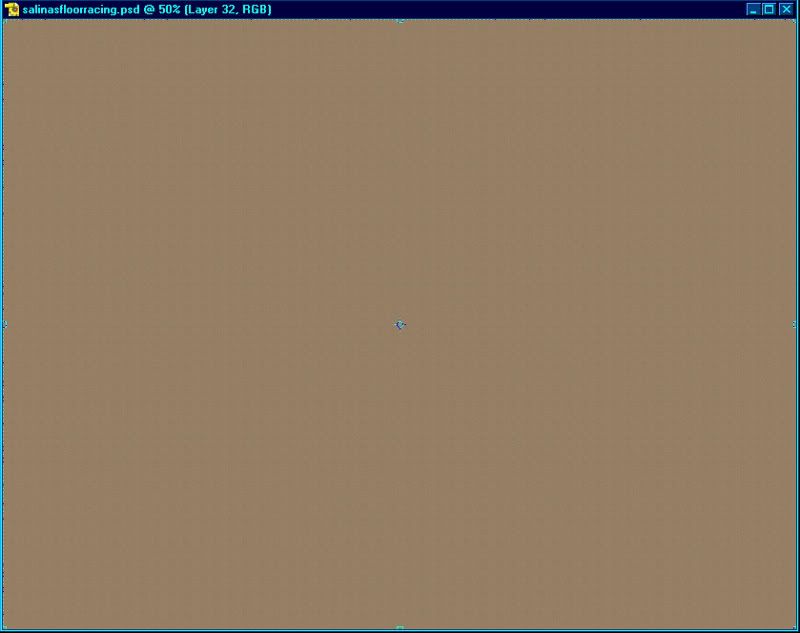
Please don't use my texture until after i've released salinas.
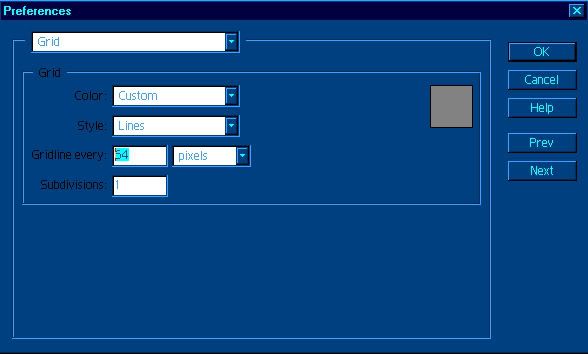
Now that you have the texture ready to use, it's time to set up the grid lines. go to the "edit" tab in the top of the window, scroll down to "Preferences", then click on "Grid..." as seen below(older picture so don't mind the background images).
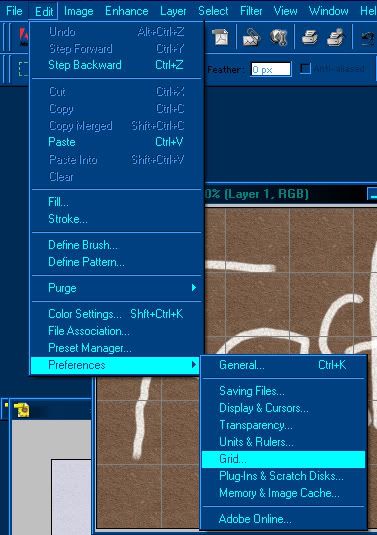
Now set the "Subdivisions" to 1 and the "Gridline every:" to 64 and if you want an easier to see grid lines then click on the gray color in the right of the window and change it to whatever you want.
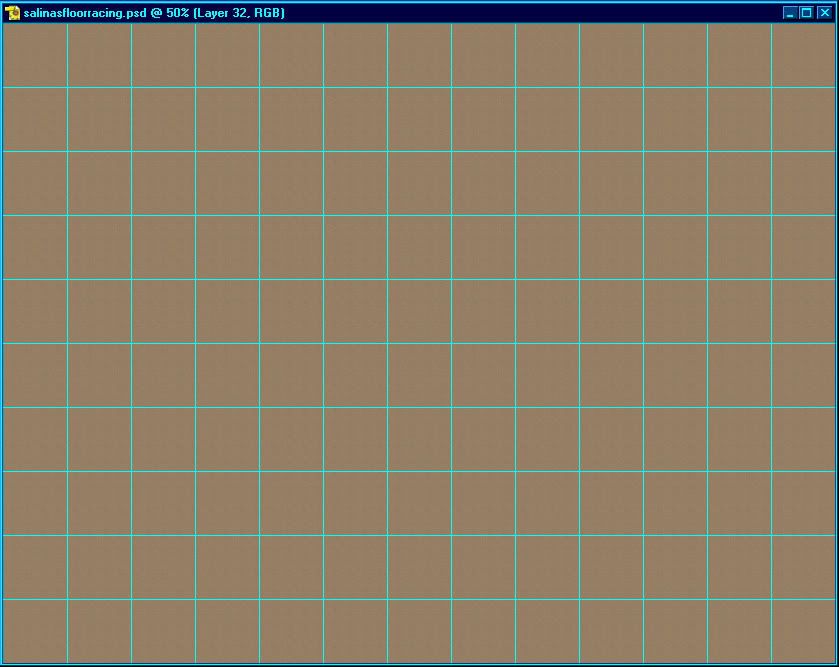
Now under the "view" tab scroll down to "grid" and click on it, you should see something like this,
Now it's time to paste the picture from traxx as described earlier.
"The first thing we'll do is, in traxx, set the "wire frame" option in the right of the screen to all black and green lines by clicking the check mark. Just click it twice and you can keep clicking it to cycle through the different grid styles."
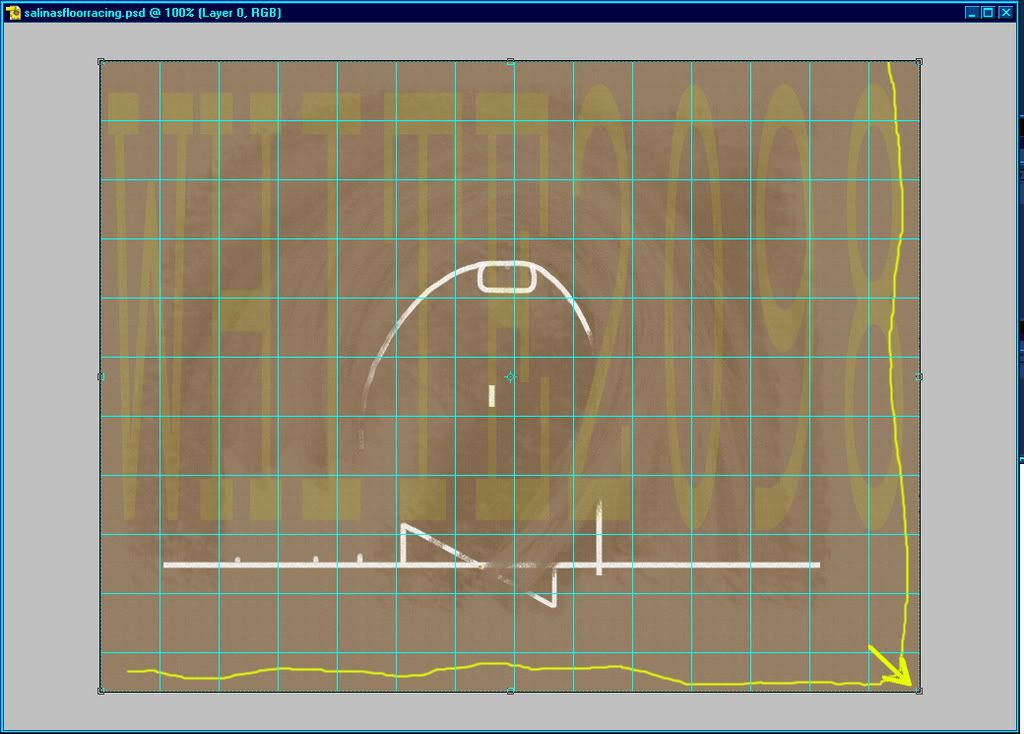
Paste that overhead picture into the image in photoshop. Cut out the grids you plan on texturing(in this case an 11x8 grid) and line the green grid lines up with the grid lines in photoshop. Make sure you're lining up the green lines with the right grid lines in photoshop. Don't forget about the 64 pixel border that you're supposed to leave blank.
*Note, make sure you line the lines up as perfect as possible so there is no chance of miss-aligning textures. I would suggest turning "Snap to grid" off in the column where you turn the grid lines on/off in photoshop(view tab).
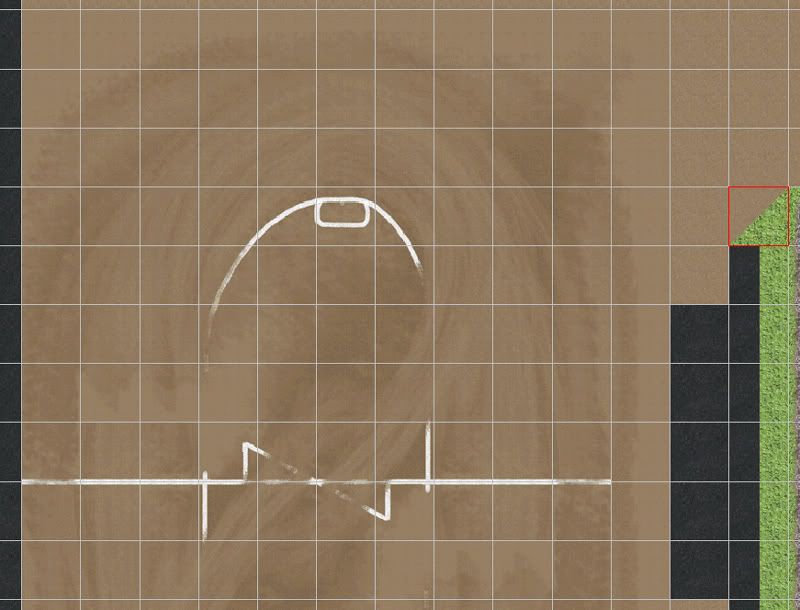
Here is a picture of what it should look like after being lines up

*NOTE - notice the "move tool" option i have selected in the far right. that tool is what you'll use to adjust the image size by hand and move it around.
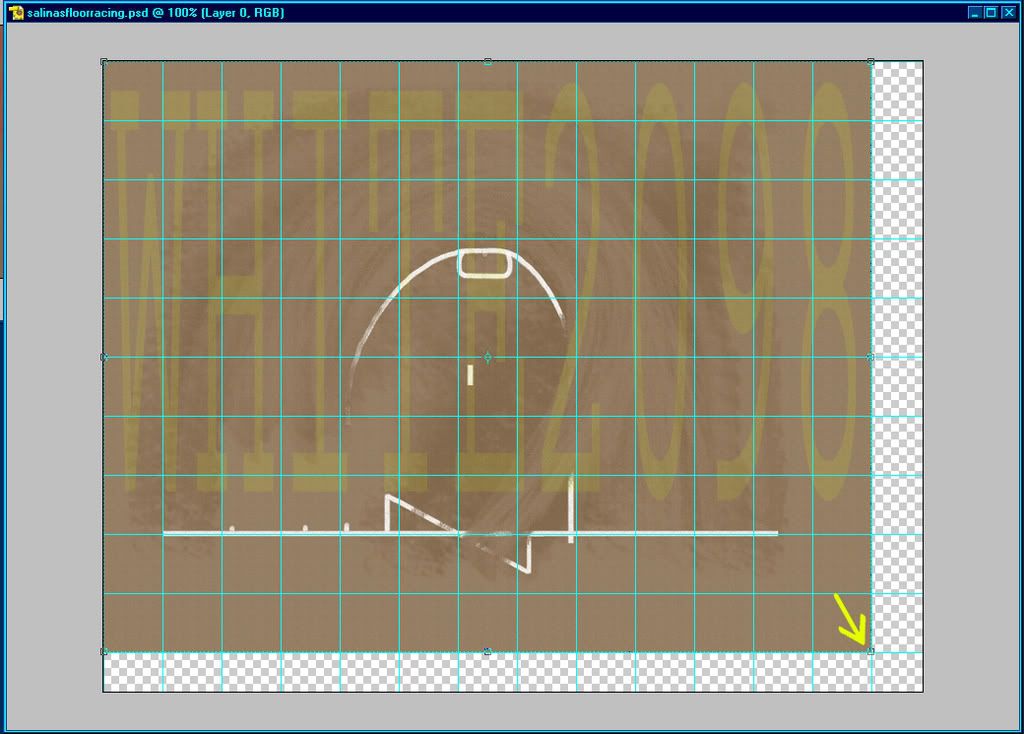
Now that we have everything lined up, it's time to get rid of the black background and green lines. Select the "Magic wand tool" by either clicking on it or pressing "W". you can change the tolerance between 1 and 100, 100 being the strongest in the top left of photoshop.
Select all of the black and green lines(hold CTRL down while clicking on the black and green sections) and once all the black/green is selected press "delete".
Now you should have this(this is a picture i already had so it looks a little bit different from the picture above),

OK, now we have the texture ready to paint!
Before we begin painting though, i wanna show you a quick little trick for better looking textures. Go back to the dirt layer and copy it then paste it down as many times as you want(3-4 is good for me). now, select the layer right below the top dirt texture you just copied by going to the layers window. Now click on the "enhance" tab in photoshop and scroll down to "adjust color" then click on "color variations".
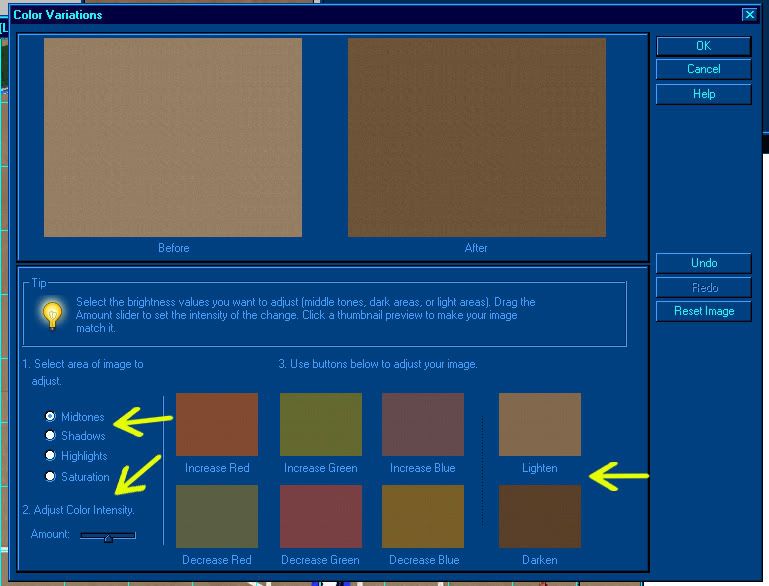
the arrows point to some of the options that will come in very handy. the top left arrow shows that the "midtones" option is selected(best for adjusting overall color). the bottom left shows the strength of the color changes. the less you have the bar set to the less the picture will be affected. the far right arrow shows the different choices you have to chose from.
Now lets get back on track here. Change the first layer below the main dirt texture to be a little bit darker(or different color, whatever you want) and do the same with every texture below the main one. Doing this will make it so you can paint the textures and look realistic later one.
I'm not going to get into all the texturing side of it, but i'll give a brief explanation of things you can do.
Chalk lines,
Chalk lines can be tricky, but also easy. you can go through various paint brushed in the top left of the photo shop screen(you need to select paint brush first). I personally like "dry media brushes" and "assorted brushed" the most for track texturing. Use one of those to draw chalk lines.
Dirt,
Dirt can be a long agonizing experience if you want as detailed work as i make, but it's always worth it! I used the "eraser" tool for dirt textures(the eraser tool also has the various brushes available). i select the top layer of dirt and start erasing it. you'll see the next layer start to show. you can also change how strong the brushed are from 1% to 100%. Each layer you erase brings out the next layer, so you can have a multi colored floor like on salinas.
Hopefully your texture process has gone well, so now it's time to send to traxx for the final product!
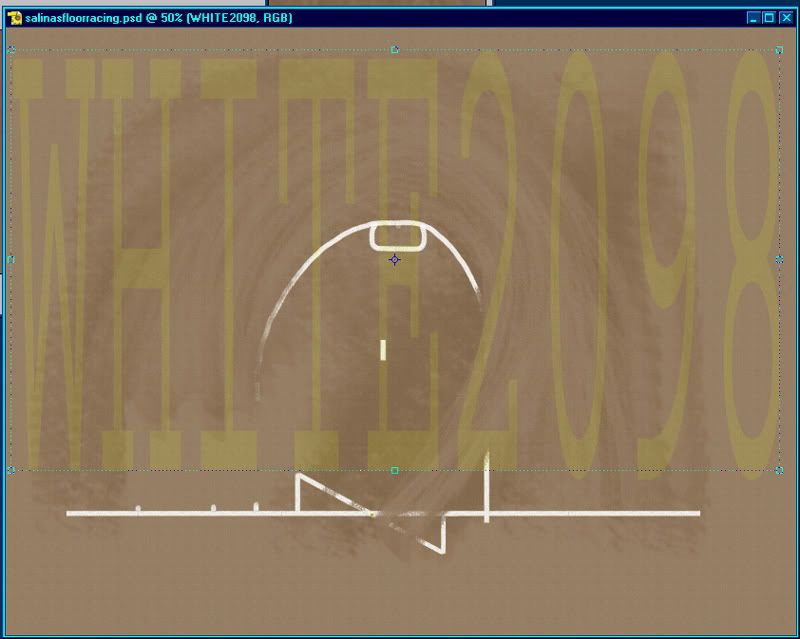
The first thing we need to do is delete the picture we took in traxx so all you see is the dirt you plan on laying out.
your picture should look like this(minus the logo),
Now, go back to the grid changing process described earlier in the topic.
Quote:
Now that you have the texture ready to use, it's time to set up the grid lines. go to the "edit" tab in the top of the window, scroll down to "Preferences", then click on "Grid..." as seen below(older picture so don't mind the background images).
Now set the "Subdivisions" to 1 and the "Gridline every:" to 64 and if you want an easier to see grid lines then click on the gray color in the right of the window and change it to whatever you want.
This time change the grid to 60 instead of 64.
Now you should see an offset grid like so,
Under the "layer" tab select "flatten image" at the bottom.
Under the "view" tab select "snap to grid" and resize the image to it's correct size,
Copy the image and paste it in a new canvas.
Now click the "Image" tab and highlight "mode" then click on "index color". make sure you set the colors to 256 and the rest of the options are up to you.
Go back to your track and go to the textures mode and open the textures window. Go back into photoshop and copy the resized picture and go back to traxx. click on the "paste composite" option as seen below.
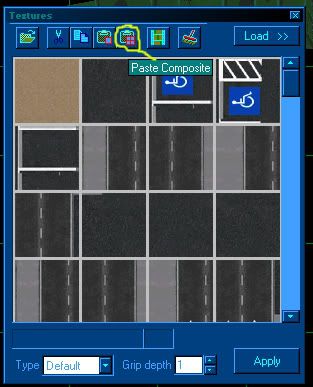
the picture will show up in a window like this,
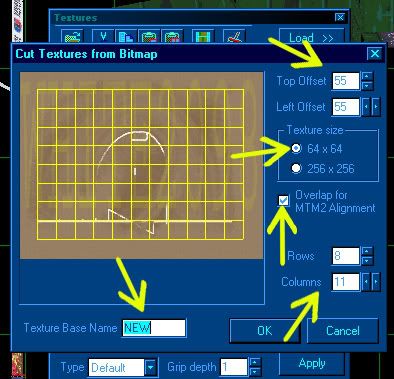
make sure you do the following before sending it to traxx.
1 - top offset and left offset should start at 55 each then you can move them around based on your judgment. this is how the textures will be sliced up.
2 - Make sure the texture base name is a short(4-5 letters at most, i would say) unique name. traxx will automatically number the textures with your unique name in the front.
3 - make sure the texture size is set to 64 pixels
4 - check the overlap option
5 - make sure the columns are set to what you need them to be(11 wide 8 tall for me).
now click ok and all of the textures will now be in traxx!
the next part is easy, but tedious. Set the width and height for texturing to 11x8 and put an odd but noticeable texture in place of the dirt(this will make your chances of getting lost while pasting textures a lot less likely),
now set back to 1x1 sized texture painting.
Make sure you've set all of the new textures to "dirt" or whatever ground style you want.
The textures line up from left to right top to bottom. so select each texture and paste it over the odd textures you have on the track from left to right until you're done.
Now for the bottom side, select the entire texture and paste it somewhere off on the side of the track and rotate it 90 degrees twice so it's upside down and paste it on the other side of the track.
Now you're done and it should look something like this!
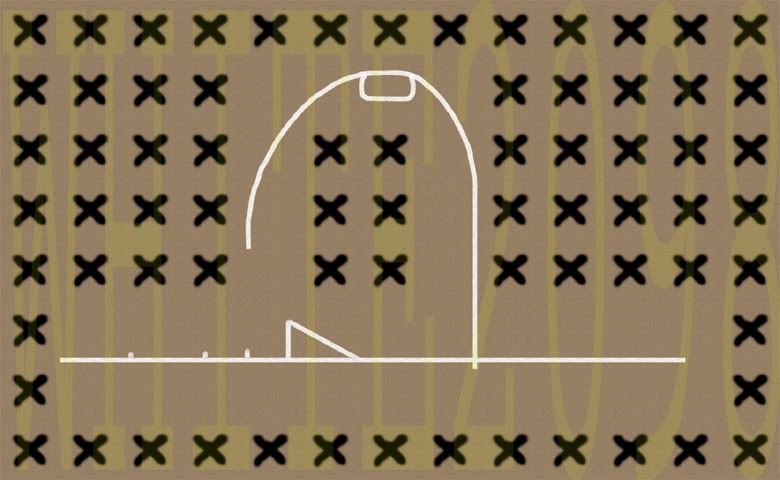
one more quick note,
If you want to make a simple texture like just chalk lines for example then mark an X or some kind of marking to signify an unused texture. Then delete all the textures after you've laid everything out.
here is an example picture of what i'm talking about,


![[tu]](./images/smilies/smilie_tup.gif "Thumbs Up")